

 Dansk
 Svenska
 Deutsch
 Norsk bokmål
Build an automated journey
A journey sends messages by itself, triggered by something a customer does. A
welcome after a first visit, a nudge after a month away: set it up once, then it runs.
Before you start
- Journeys are part of the Customer marketing plan. Without it, the page shows
Add customer marketing instead. - The message the journey will send exists as a template. See Write and edit messages.
- If the journey is aimed at a particular group, build that first. See Build a customer segment.
1. Open Journeys
In the sidebar, open Grow and then Journeys. You can filter the list by
Active and Inactive, and by Custom (ones you built) and Predefined
(ones that come with the system).
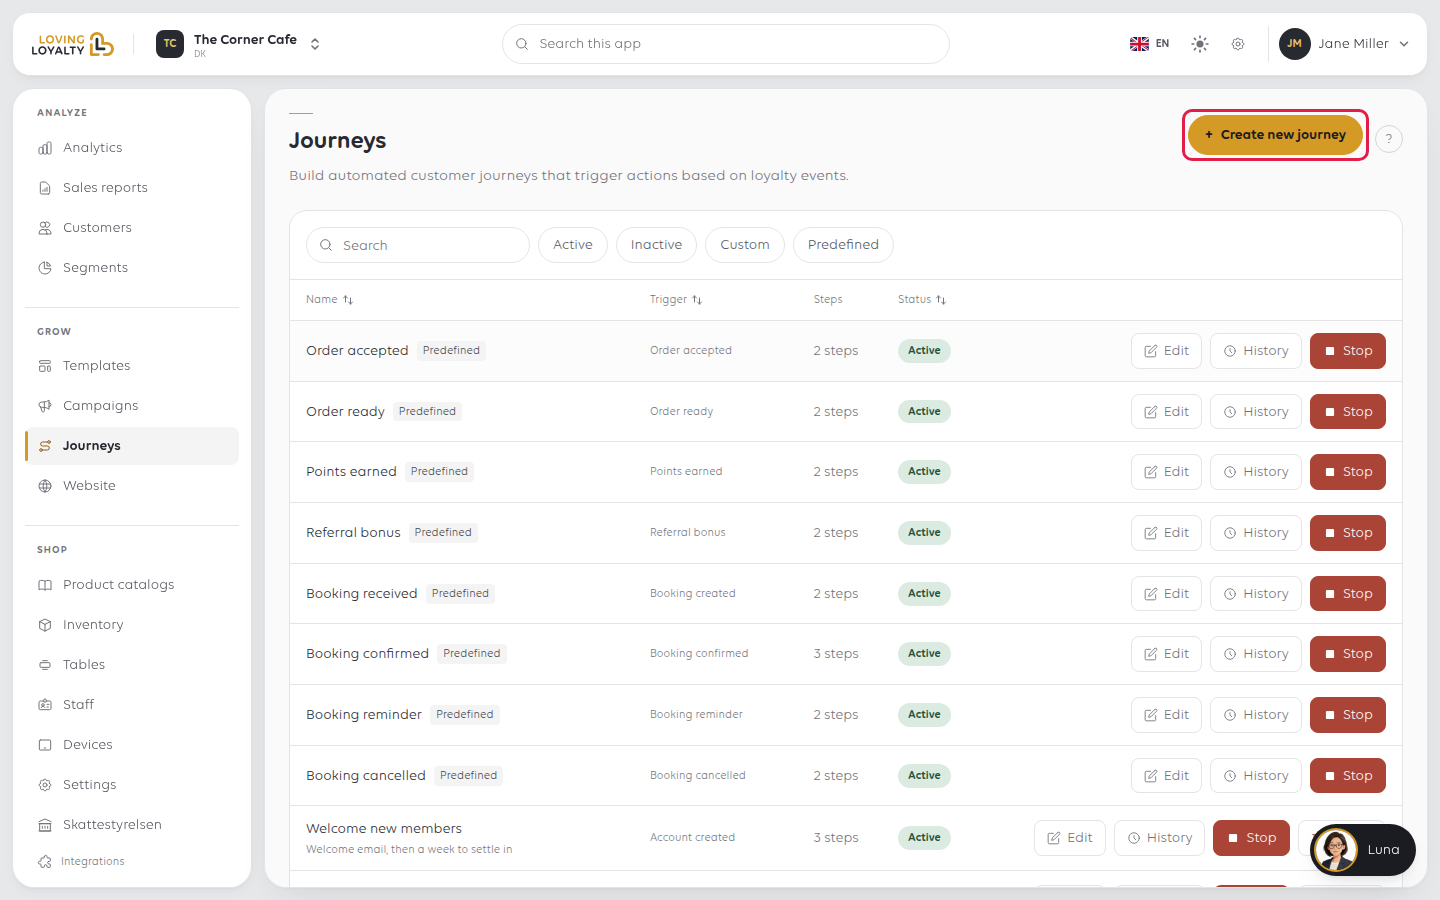
The predefined journeys are the quickest way to learn: open one, see how it is put
together, and copy the shape.
2. Name it and choose the trigger
Click Create new journey. The editor opens with a canvas: the trigger at the top,
then End.
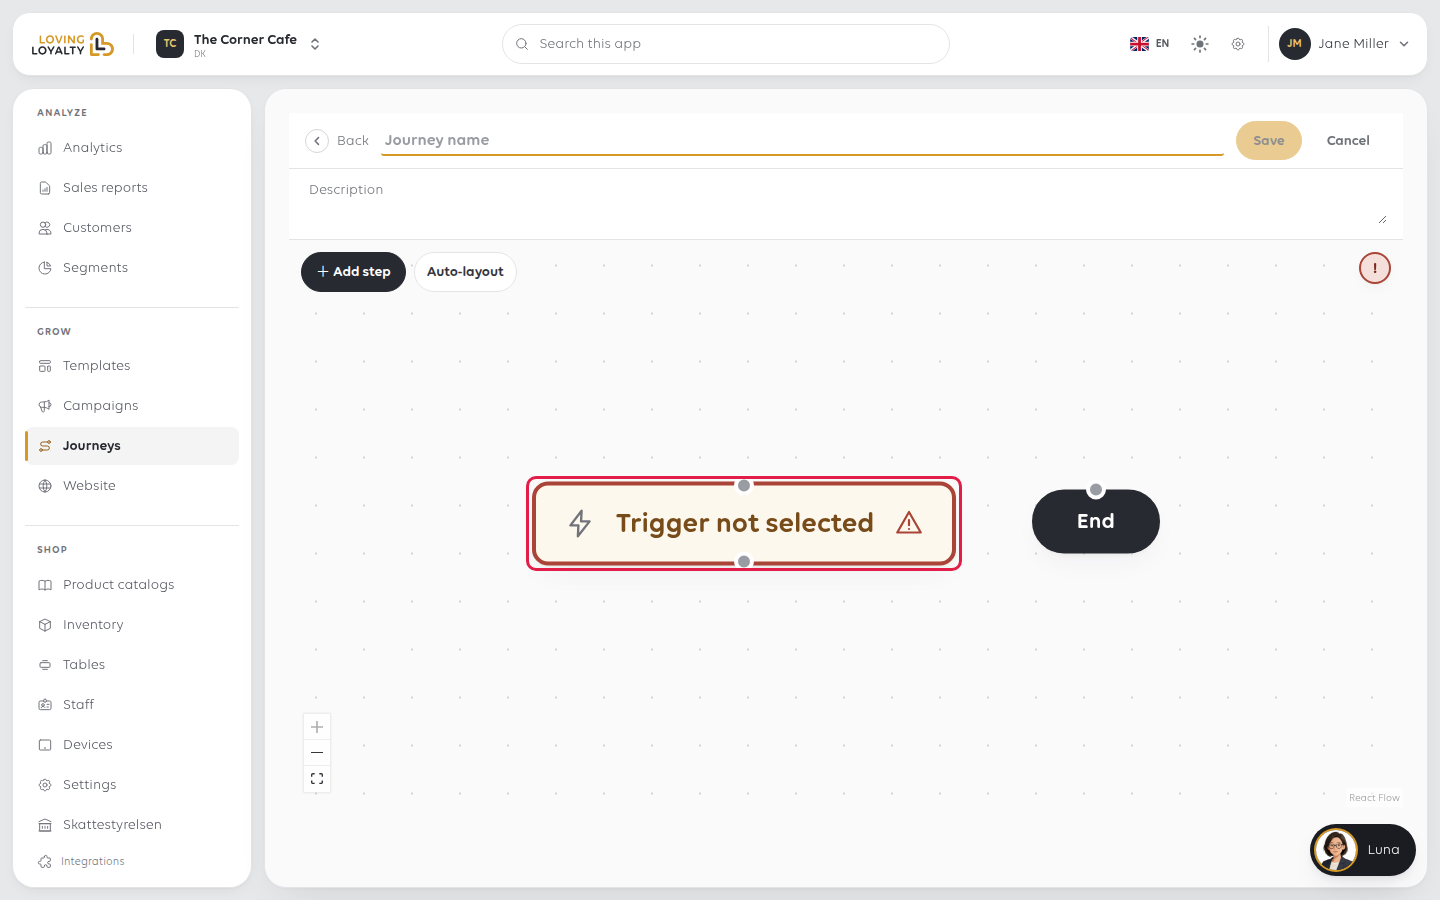
- Type a name in the Journey name box at the top. A Description is optional.
- Click the trigger box, which says Trigger not selected.
- Pick the event from the Trigger event list. This decides when the journey
starts for a customer.
Choose carefully: the trigger cannot be changed once the journey is saved.
3. Add the steps
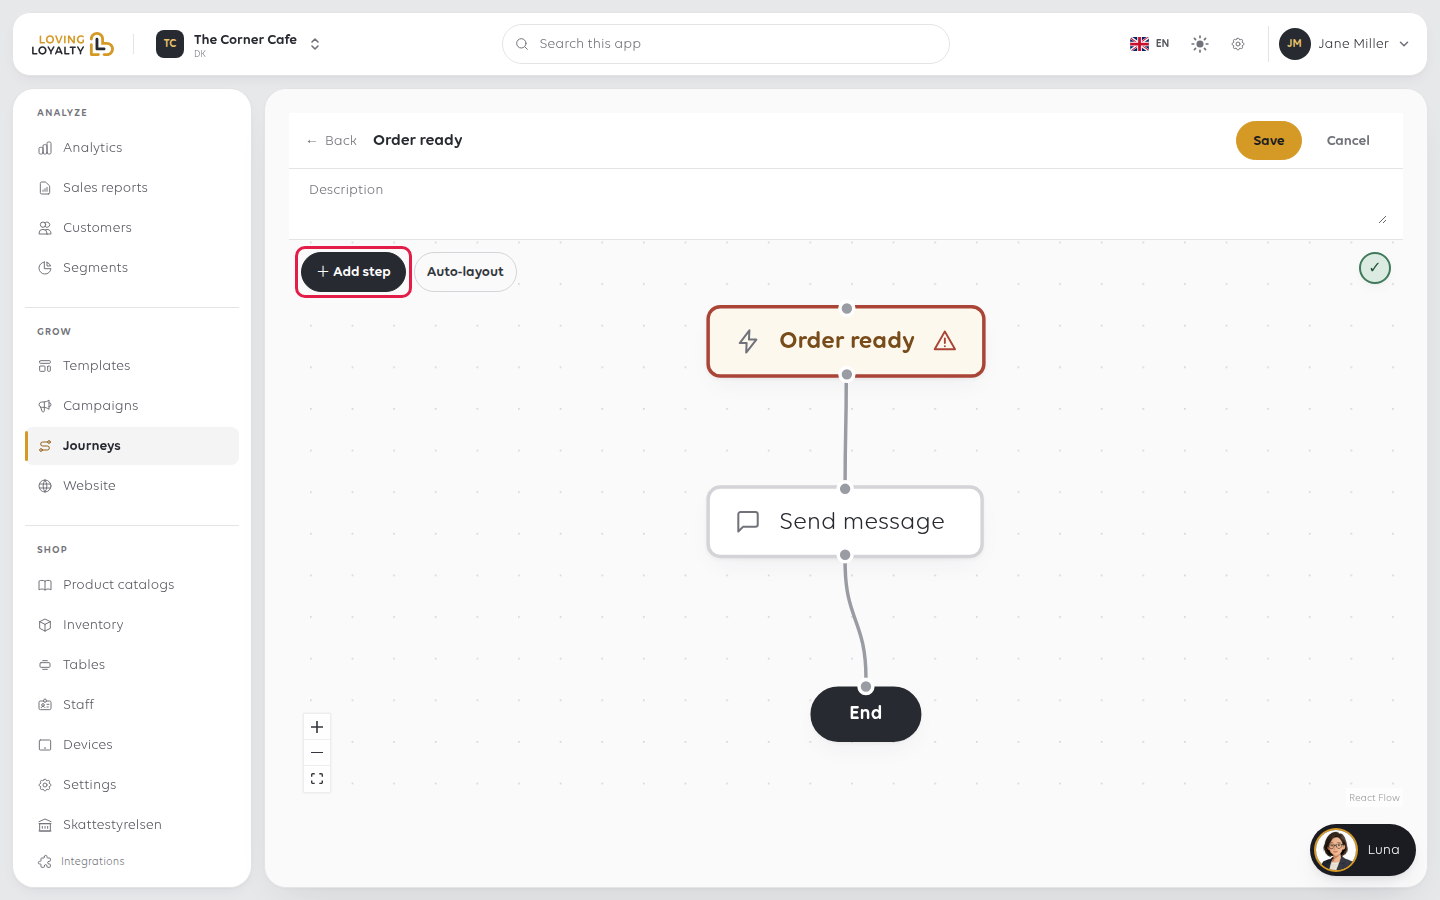
Click + Add step and pick one of six kinds:
| Step | What it does |
|---|---|
| Send SMS | A text message |
| Send email | An email |
| Send push | A notification to the customer app |
| Wait | Holds the customer here before the next step |
| Condition | Splits the path on something about the customer or the order |
| Create campaign | Issues a campaign to the customer at this point |
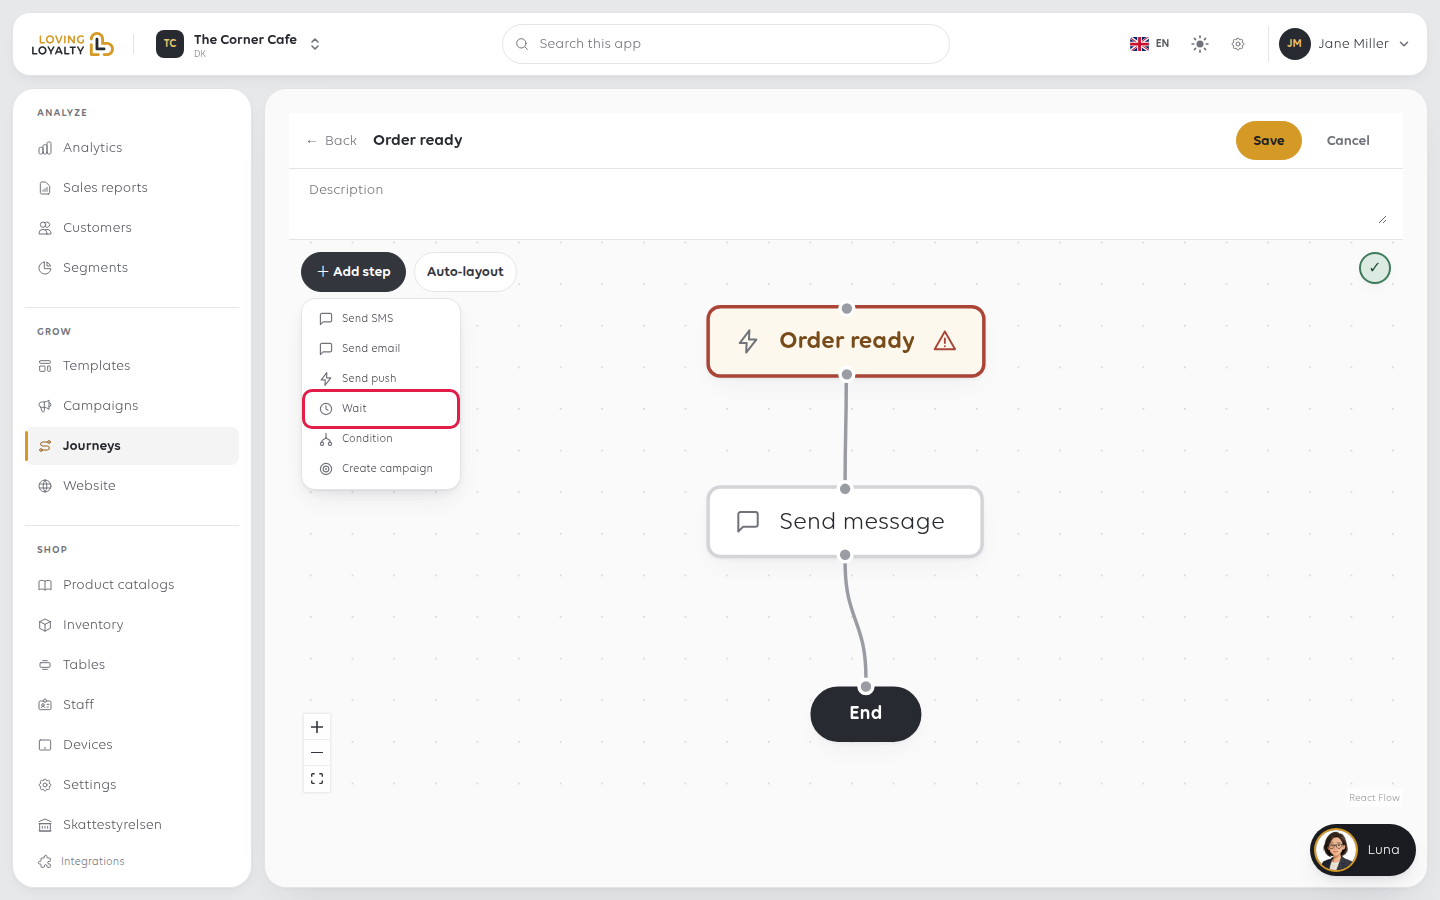
Click a message step to set it up. It shows the step name, its Channel (SMS,
Email or Push) and the template it sends. Change picks a different template.
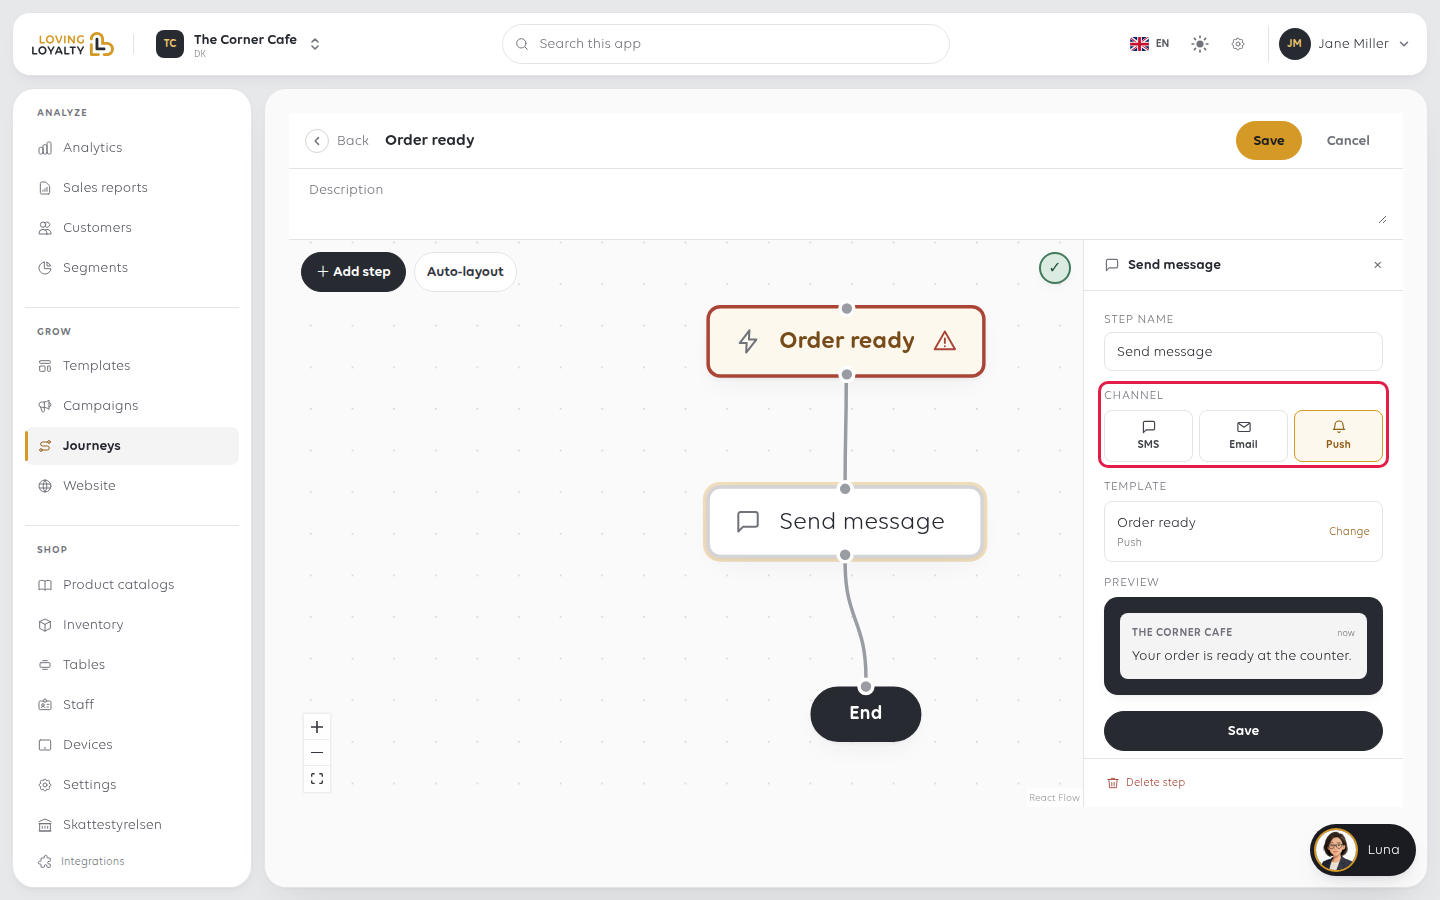
Auto-layout tidies the canvas. The flow check on the canvas says Flow is
valid when every step is set up and connected; if it says Flow has issues,
click it to see what to fix.
A finished journey reads top to bottom: the trigger, the steps, and End. The
Order ready journey is three boxes: the trigger, one message and the end.
4. Save and switch it on
Click Save. Save stays greyed out until the journey has a name and a trigger.
A Journey created message confirms the save.
Back on the Journeys list, check the journey's status. If it shows Inactive,
click Start. Stop pauses it again. A journey with a manual trigger has
Run instead: it runs once, for every customer or only the segments you choose.
The journey messages the customer on the order, so an order rung up as
Anonymous has nobody to message.
If something goes wrong
| What you see | What it means | What to do |
|---|---|---|
| Save is greyed out | The journey has no name or no trigger | Add a name and choose a Trigger event |
| Flow has issues | A step is not set up or not connected | Click it to see which step |
| The journey never sends anything | It is inactive, or its trigger has not happened yet | Check it is Active, then open History |
| The message is wrong | Journeys send templates | Edit the template rather than the journey |
Was this article helpful?
Thanks for your feedback!