

 Dansk
 Svenska
 Deutsch
 Norsk bokmål
Set up another Android device (Softpay)
Use this when your device runs Softpay but is not one of the models the POS lists —
the Other tile. The setup is shorter than a listed model's, and that is the
point to understand: because the POS does not know what the device is, it does not
ask about a built-in printer or a cash drawer, and it will not configure either for
you.
If your device is listed — a Sunmi T2s, V3 Mix, V2s or P2 Pro, or a Landi M20 or
C20 Pro — use its own guide instead. You will get the printer and drawer steps, and
they save you setting those up by hand.
Before you start
- The device is switched on, connected to Wi-Fi, and the Softpay app is installed and activated on it.
- Do this on the device that will take the orders.
- Decide how receipts will print. Nothing in this flow sets up a printer, so a receipt printer has to be configured separately afterwards.
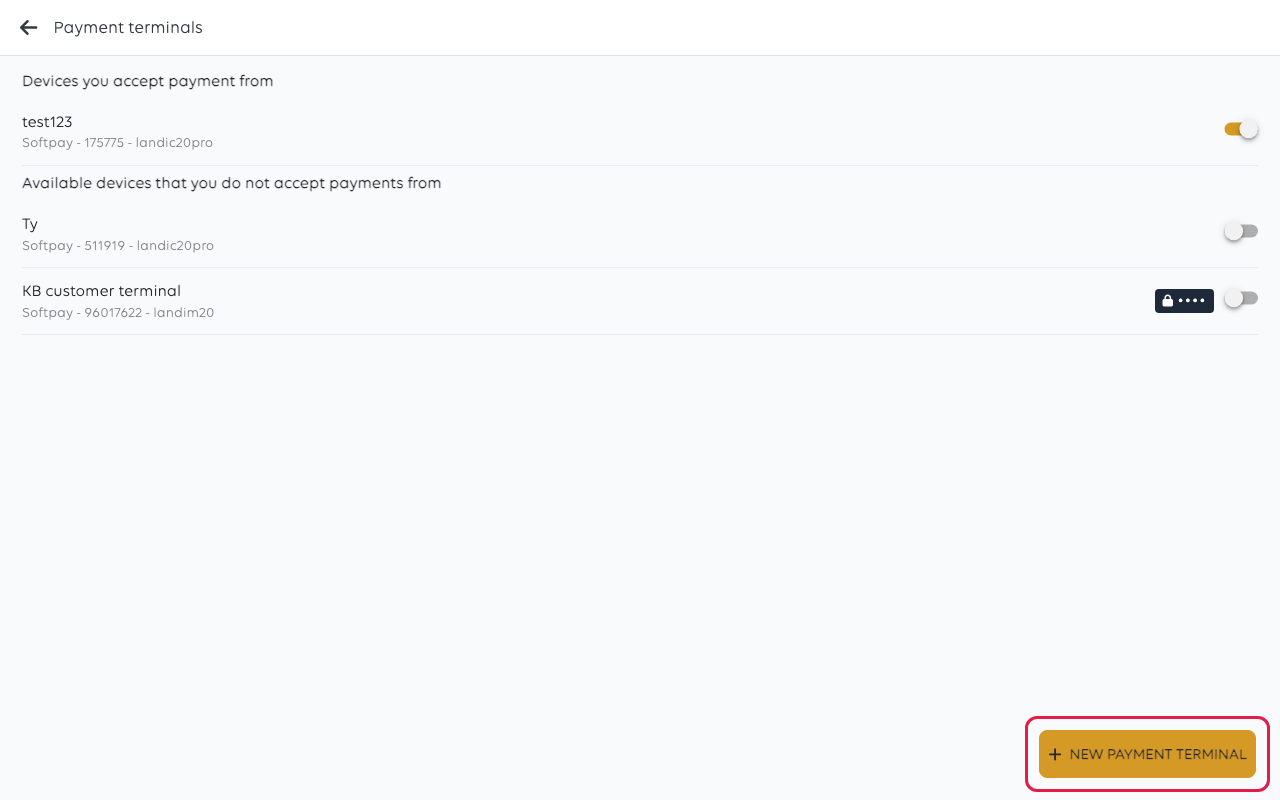
1. Open the payment terminals list
Open the menu at the top left and choose Payment terminals. The list shows every terminal already known
to this shop, with its provider, ID and model under the name.
Tap New payment terminal. If the POS first shows Choose provider, tap
Softpay, then tap Continue.
2. Choose the setup
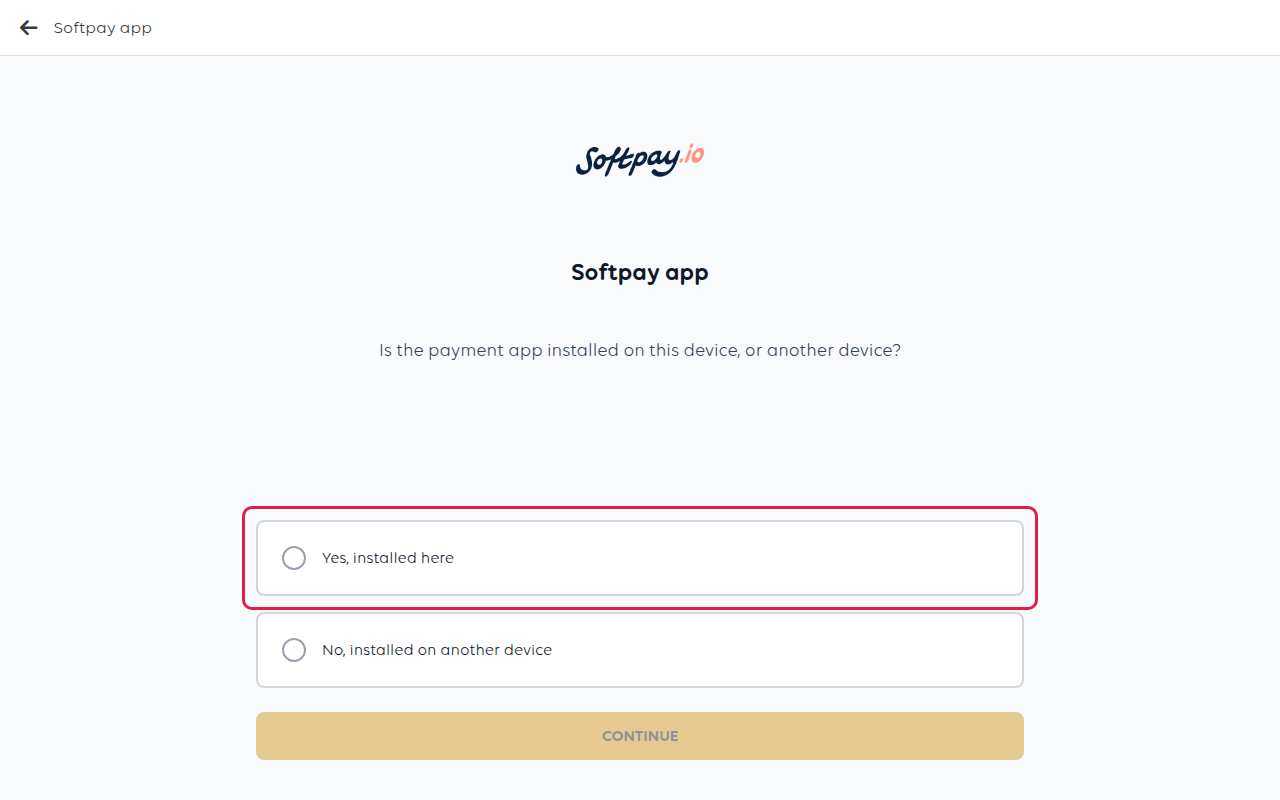
The POS asks where the Softpay app is installed.
- Tap Yes, installed here if this device both takes the order and takes the
payment. - Tap No, installed on another device if Softpay runs on a separate terminal
that faces the customer.
Tap Continue.
If you are unsure, read Which terminal setup do you need? — the answer decides
whether the customer sees anything on the terminal.
3. Choose Other
Tap Other, then tap Continue.
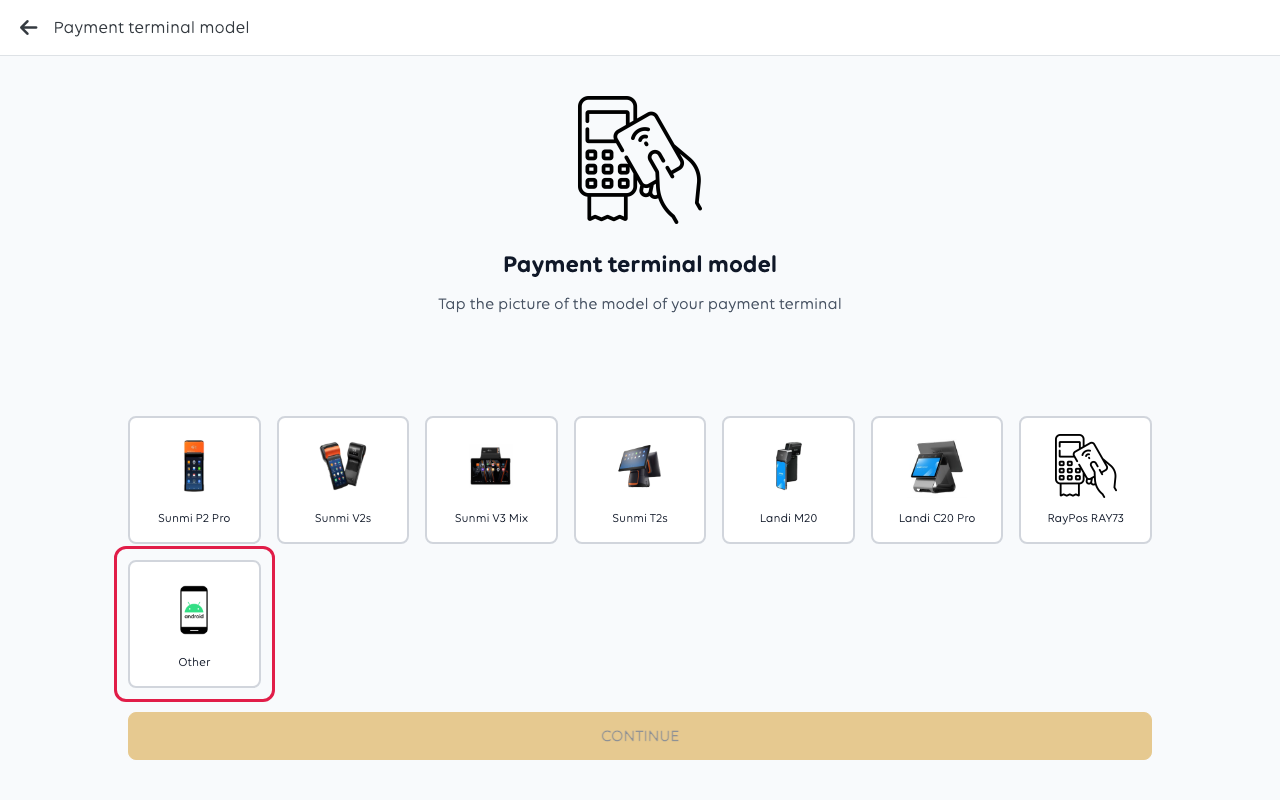
Check the grid before you choose this. If your device is there by name, pick it —
Other skips the steps that configure a built-in printer and a cash drawer.
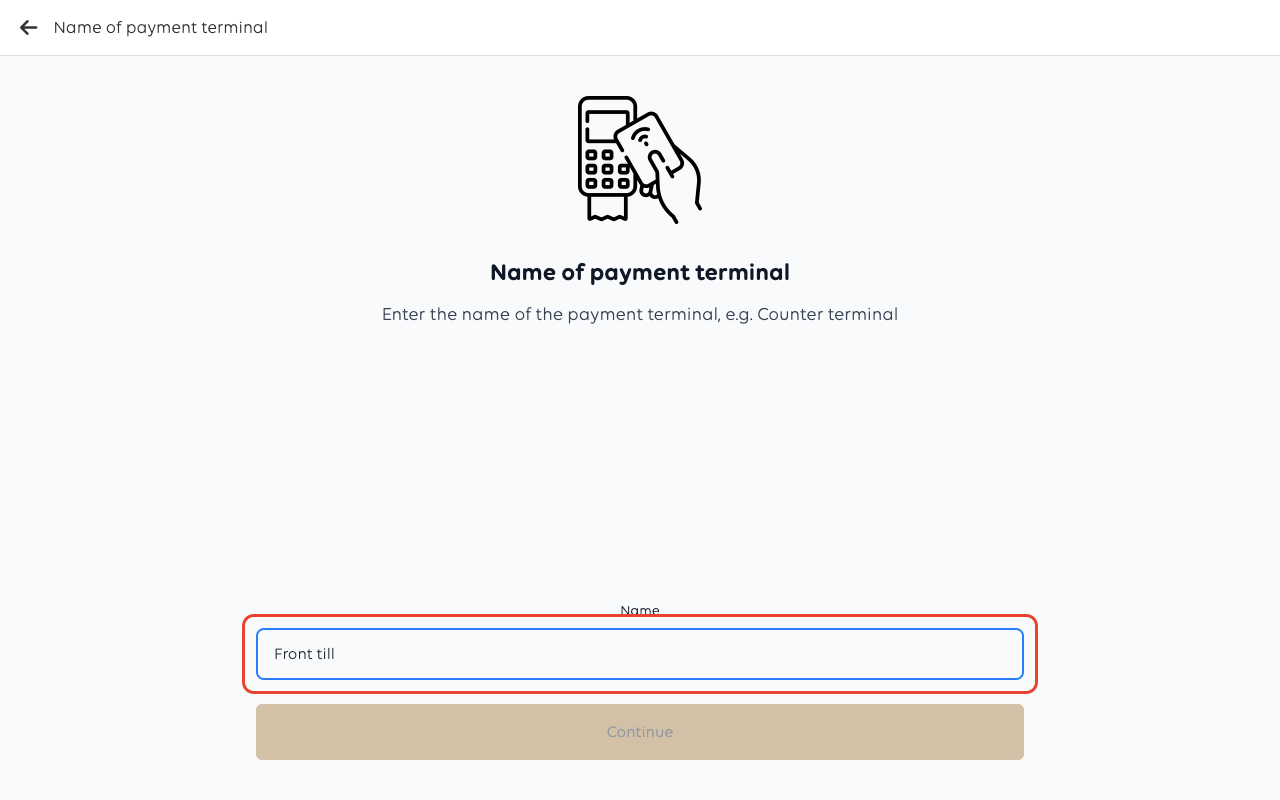
4. Name the device
Because the POS does not know the model, this is the last question: give the device
a name your staff will recognise, such as Front counter or Handheld 1.
Tap Continue. When it worked, the POS shows Payment terminal created
successfully! and takes you back to the terminal list.
5. Finish setup on the device
6. Set up printing separately
This flow asked nothing about printing, so receipts have nowhere to go until a
printer is configured. Set up the printer the device will use, then run a test
print before the first trading day.
7. Check it works
- Ring up a test item and choose Card.
- Complete the payment with a real card, then refund it from the order.
- Confirm a receipt printed on whichever printer you configured in step 6.
A payment is only complete when the POS shows it as Settled. If it stops at any
other status, the customer may not have been charged.
If something goes wrong
| What you see | What it means | What to do |
|---|---|---|
| The checkout waits for a terminal that never responds | The answer in step 2 does not match where Softpay actually runs | Remove the terminal and redo step 2 with the other answer |
| Nothing prints after a sale | No printer was configured — Other does not set one up | Set up a receipt printer for this device |
| The cash drawer does not open | Other does not configure a drawer | Attach the drawer to a device the POS knows by model, or set the drawer up separately |
| Softpay shows an activation or quarantine error | The device is not activated with the payment provider | Do not set it up again; contact support |
Was this article helpful?
Thanks for your feedback!